
Question sent in from Julio from New York.
Q: I am running Red Hat Enterprise Linux 7 Workstation and having a hard time adding search domains. My work has several domains and I want to be able to use the short names. I have tried the network settings and don’t see a place to add search domains. I have also added search domain1 domain2 to /etc/resolv.conf but it gets replaced every reboot by Network Manager. Any help?
A: This is because Gnome does not give you a place to enter search domains in their Network Settings GUI. Also, the /etc/resolv.conf file is generated every time the Network Manager service starts or restarts which overwrites the manual changes.
What Are Search Domains and Why Use Them?
Search domains are domains used to append to a hostname to create a fully qualified domain name. If you configure your system with three search domains, it will use these names when it receives an incomplete FQDN. For example let’s say your office used a domain of example.com. So the servers are named similar to server1.example.com. If you add example.com to your search domains, you would be able to access the servers using the short name “server1”. The search domains are automatically appended to the end of host names. If you add multiple search domains they will append one by one until they resolve in DNS.
How to Add Search Domains in Network Manager
Now that we understand what a search domain is and why we need it, let’s learn how to add them. Network Manager gives you several ways to interact with it. The GUI is probably the easiest, especially if you rarely need to make these types of changes. If you are a Linux Admin with a lot of systems, you might prefer the command line. Let’s get started.
Adding Search Domains via the GUI
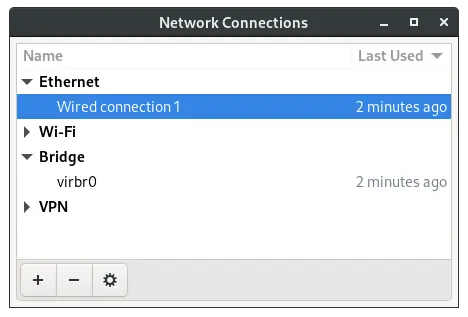
You can run the Network Manager GUI configuration tool by running the following command:
sudo nm-connection-editorOnce the Network Manager Connection Editor opens, select the network adapter you want to change the settings for and click edit (little gear icon).
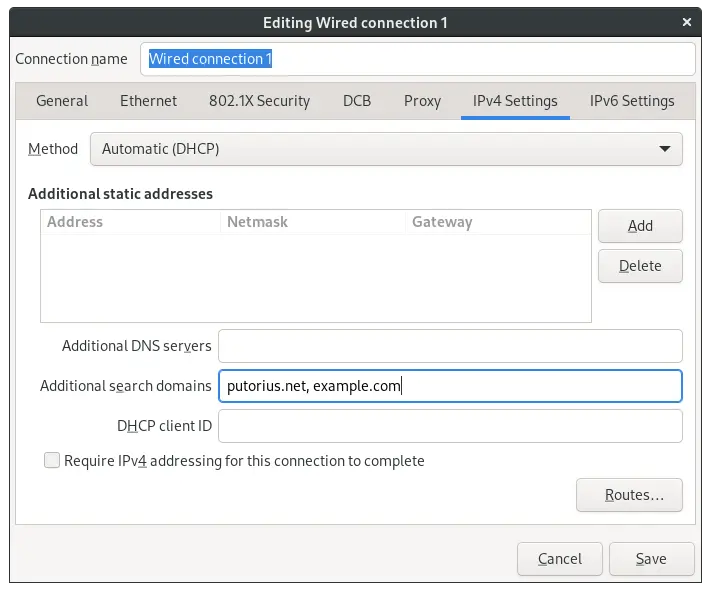
Go to the IPv4 Settings page and enter the domains in “Additional search domains” field (separate multiple domains with a comma).
Adding Search Domains via Command Line Using NMCLI
Option 2 is to use the Network Manager Command Line Interface (nmcli). First run nmcli without options to find the name of the interface like so:
sudo nmcli

em1: connected to em1
"Intel Ethernet Connection (3) I218-LM"
ethernet (e1000e), 83:7B:FB:41:6B:78, hw, mtu 1500
ip4 default
inet4 192.168.38.83/22
inet6 fe83::8043:90fb:ff4e:9590/64

wlp2s0: disconnected
"Intel Wireless 7265 (Dual Band Wireless-N 7265)"
wifi (iwlwifi), 62:EF:10:F9:3B:BE, hw

lo: unmanaged
"lo"
loopback (unknown), 00:00:00:00:00:00, sw, mtu 65536

DNS configuration:
servers: 192.168.16.40 192.168.16.10
interface: em1
Interface em1 is our main wired connection, and that is the one we want to change. To add the search domains to em1 interface use the nmcli command like so:
sudo nmcli con mod em1 ipv4.dns-search "domain1.local,domain2.local,domain3.local"Now use the show option to check the configuration. We we use grep to pull just the dns search information.
sudo nmcli con show em1 | grep dns-searchHere is an example output:
ipv4.dns-search:                        domain1.local,domain2.local,domain3.local
ipv6.dns-search:                        --
Now that we have updated the network configuration we need to restart Network Manager so the changes will take effect.
sudo systemctl restart NetworkManagerWhen Network Manager restarts, it should now generate the correct settings in /etc/resolv.conf.
# Generated by NetworkManager

search domain1.local,domain2.local,domain3.local
nameserver 192.168.16.40
nameserver 192.168.16.10
That’s it!
In this tutorial we covered what search domains are, how they are used, and why we might need them. We also looked at some examples of adding them through the GUI and from the command line. If you have any questions or comments we would love to hear them.
I take pleasure in, lead to I discovered exactly what I used too be taking a liok
for. You have ended my 4 day lengthy hunt!
God Blerss you man. Have a great day. Bye
It may be trivial, but add that the "em1" in your example refers to the "connected to em1" string part, not the "em1:" identifier.
In my case I had a "connected to some_string_with white spaces" in it, so the nmcli con mod and show required to have the "some_string_with white spaces" as the argument value.
I had this experience as well, on Ubuntu.
RHEL accepted the interface as an argument.
Just run nmcli without arguments, find your interface, and copy the string it shows as the connection, as anonymous stated. And don’t forget the quotes, of course. Single seems to work.
Nice write up my friend, very helpful. We have an ongoing situation with setting up our lab hosts, where we have to add domains to the search string in resolv.conf in order for our systems to get to our NIS servers. This has been a hassle since resolv.conf became a link to a dynamically updated file. Four or five different methods to update it without direct editing, most of which don’t really work. 😉
This method does, with a minimum of fuss.
Thanks from Intel IT Lab Compute!
Very helpful. Thank you.
Thanks a lot! I have just prepared a VM with CentOS 7 and adding more than one search domain (the default) was the only thing left. It worked, great explanation!