
Many believe you do not need an antivirus if you use Linux. I am not going to start that debate here. However, in my opinion it is always better to have one and not need it, than to need one and not have it. In this tutorial we are going to show you how to install, configure, and scan for viruses on Linux with ClamAV. ClamAV is a fully open source antimalware toolkit. It is available for almost any operating system, including Windows (ClamWin).
Table of Contents
Installing ClamAV on Linux
Let’s start by installing ClamAV and it’s GUI interface ClamTK. This is easily accomplished through your package manager.
Installing ClamAV on rpm Based Systems (Fedora, Red Hat, etc..)
To install ClamAV and it’s GUI interface on rpm based systems like fedora, simply use dnf and specify the following packages.
[savona@putor ~]$ sudo dnf install clamav clamtkInstalling ClamAV on apt/deb Based Systems (Ubuntu, Debian, Mint, Kali, etc..)
Installing on Debian based systems is just as easy. Just use apt like so:
savona@ubuntudev:~$ sudo apt install clamav clamtkInstalling ClamAV Using the Gnome Software GUI
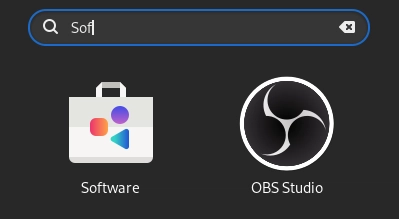
If you prefer to install applications from the GUI you can use the Gnome Software Center. Simply open the Software Center by hitting the Super key and search for software. Select the Software icon to open the application.
Now that software center is open, hit the search feature on the top left and enter ClamTK.
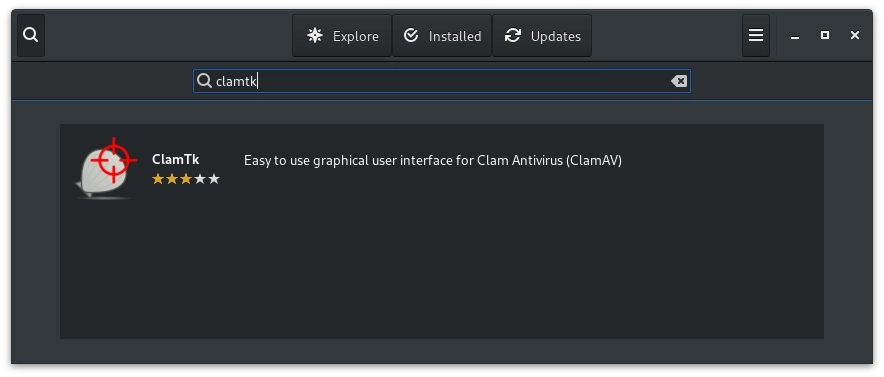
Simply click the ClamTk icon to install it. ClamAV and all other dependencies will be automatically installed.
Updating the ClamAV Virus Definition Database
It is very important to update the virus definition database once the packages are installed. Freshclam is a tool specifically designed for this task. Simply calling it on the command line with update the database.
[savona@putor ~]$ sudo freshclam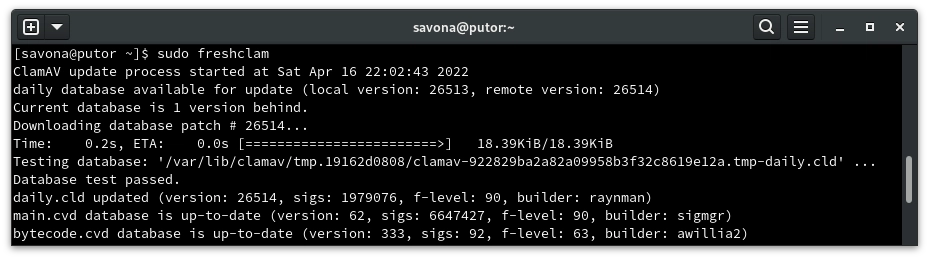
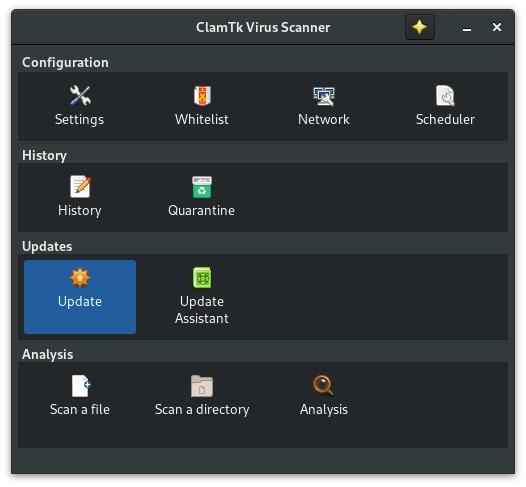
You can also update the virus database using the ClamTK GUI. Go into your applications and launch ClamTK. Once it’s open, simply click the “Update” button.
Configuring ClamAV Automatic Signature Database Updates
The ClamAV team says they update the virus signature database approx twice daily. If you do not update the signatures often you can be using an old database. The easiest way to keep the signatures updates is to use the clamav-freshclam service. Let’s start the service and enable it at boot.
Start the clamav-freshclam service:
[savona@putor ~]$ sudo systemctl start clamav-freshclamSet the clamav-freshclam service to start on boot:
[savona@putor ~]$ sudo systemctl enable clamav-freshclamAlternatively, you can set freshclam to run whenever you like as a cron job.
How to Scan Files and Directories with ClamAV
Now that we have a basic install of ClamAV, ClamTk, and the virus definition signatures it’s time to run our first scan. You can run a scan from either the command line, or the GUI. I much prefer running the scan from the command line. It seems like you get much more feedback and for some reason it seems to run more efficiently. However, keep reading to learn how to scan for viruses using the command line and GUI.
Virus Scanning Files from the Linux Command Line
ClamAV comes with a command line scanning tool called clamscan. If you want to scan a single file simple pass it as a argument to the clamscan utility.
[savona@putor TEMP]$ clamscan bumper1.jpg
/home/savona/Desktop/TEMP/bumper1.jpg: OK

----------- SCAN SUMMARY -----------
Known viruses: 8611304
Engine version: 0.103.5
Scanned directories: 0
Scanned files: 1
Infected files: 0
Data scanned: 2.91 MB
Data read: 2.73 MB (ratio 1.06:1)
Time: 17.543 sec (0 m 17 s)
Start Date: 2022:04:17 08:13:54
End Date:   2022:04:17 08:14:11
Once the scan completes, you will be presented with a scan summary that provides important information. In this case the file was clean.
Let’s download a “test virus” from eicar.org and run a scan against it. This will help familiarize ourselves with what to expect if there is a virus detected. Once the file is downloaded we simple pass the name as an argument to clamscan and see what happens.
[savona@putor ~]$ clamscan eicar_com.zip
/home/savona/eicar_com.zip: Win.Test.EICAR_HDB-1 FOUND

----------- SCAN SUMMARY -----------
Known viruses: 8611304
Engine version: 0.103.5
Scanned directories: 0
Scanned files: 1
Infected files: 1
Data scanned: 0.00 MB
Data read: 0.00 MB (ratio 0.00:1)
Time: 17.499 sec (0 m 17 s)
Start Date: 2022:04:17 08:17:27
End Date:   2022:04:17 08:17:44
As you can see, clamscan now shows a FOUND message instead of the OK message. It also says there is one infected file in the scan summary.
NOTE: In the next section we will discuss how to take action on the infected file.
Scanning Directories (and sub-directories) From the Command Line
Scanning directories with clamscan is very intuitive. Simply pass the directory as an argument just like you did with the file. Here is an example of scanning the Pictures directory.
[savona@putor ~]$ clamscan /home/savona/Pictures
/home/savona/Pictures/D3E36D4B_source.jpg: OK
...OUTPUT TRUNCATED...
/home/savona/Pictures/08-24-50.png: OK

----------- SCAN SUMMARY -----------
Known viruses: 8611304
Engine version: 0.103.5
Scanned directories: 1
Scanned files: 25
Infected files: 0
Data scanned: 7.99 MB
Data read: 7.57 MB (ratio 1.06:1)
Time: 18.023 sec (0 m 18 s)
Start Date: 2022:04:17 08:29:17
End Date:   2022:04:17 08:29:35
As you can see in the summary we now scanned 1 directory which contained 25 files. However, I have a folder containing some vacation pictures inside the Pictures directory. In order to scan a directory and all of it’s sub-directories we need to pass the recursive flag. Let’s try the same command but this time pass the -r option to clamscan telling it to scan into all directories.
[savona@putor ~]$ clamscan -r /home/savona/Pictures
/home/savona/Pictures/D3E36D4B_source.jpg: OK
...OUTPUT TRUNCATED...
/home/savona/Pictures/Vacation 2021/741344.jpg: OK

----------- SCAN SUMMARY -----------
Known viruses: 8611304
Engine version: 0.103.5
Scanned directories: 2
Scanned files: 36
Infected files: 0
Data scanned: 23.82 MB
Data read: 22.48 MB (ratio 1.06:1)
Time: 21.841 sec (0 m 21 s)
Start Date: 2022:04:17 08:34:02
End Date:   2022:04:17 08:34:23
Now it shows that we scanned 2 directories and 36 files.
NOTE: You can also use the -i option to show only infected files and limit the output.
With this basic knowledge we can run a simple scan on our home directory like so:
[savona@putor ~]$ clamscan -r /home/savona/Here is the summary output of the first scan on my home directory.
----------- SCAN SUMMARY -----------
Known viruses: 8611304
Engine version: 0.103.5
Scanned directories: 3155
Scanned files: 55746
Infected files: 1
Total errors: 2
Data scanned: 3055.88 MB
Data read: 20110.14 MB (ratio 0.15:1)
Time: 602.626 sec (10 m 2 s)
Start Date: 2022:04:17 08:36:50
End Date:   2022:04:17 08:46:53
As you can see we scanned 3155 directories and 55746 files. Of course it found 1 infected file because we downloaded the test virus in an earlier example.
Likewise, we can scan the whole system by simply passing the root directory as an argument.
[savona@putor ~]$ clamscan -r /NOTE: Scanning large directories or even whole systems can take quite some time.
There are a lot of options we can use to customize our scans. Nevertheless, we couldn’t possibly cover them all here. In the next section we will cover taking action (move/copy/remove) on infected files.
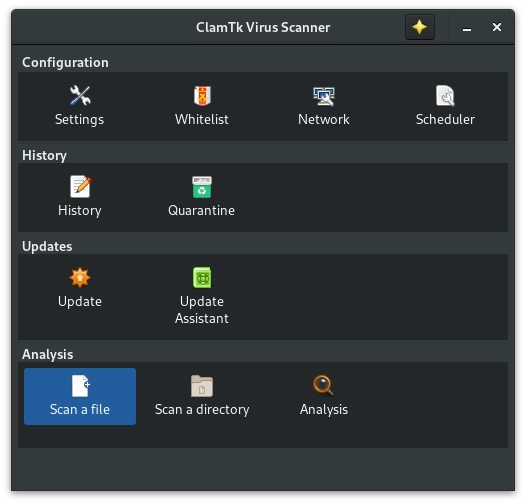
Virus Scanning Files and Folders from the ClamTK GUI
Scanning a file using ClamTk is a very familiar experience. Simply open the GUI and click the “Scan a File” option. Once the dialog box opens navigate to the file, select it, and click OK.
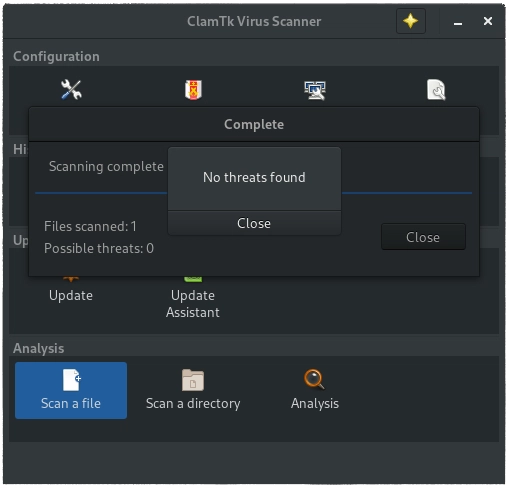
Once the scan completes you will be shown a similar summary page.
To scan a directory, select the “Scan a directory” option. By default this option will scan recursively. Meaning it will scan the directory and all the sub-directories. This is the opposite behavior of the command line utility.
Remove, Move, or Copy Infected Files
Now we should be fairly comfortable with kicking off a virus scan. But, what do we do if we find an infected file? We basically have three options. You can move the file into a directory of your choice, copy the file somewhere for further analysis, or remove the file.
WARNING: Removing (even moving) files is risky and sometimes causes major issues. You should ALWAYS be sure you know what you are removing.
Before proceeding, I feel it necessary to explain that it is very important to understand the risks involved with working with infected files. We cannot go into great detail here because that alone is a major subject. ANY action taken can have adverse affects. In our opinion, moving a file into a quarantine directory, renaming it, and ensuring it does not have execute permissions is safest for inexperienced users. If you do not feel comfortable making these decisions ask someone for help.
Using the Command Line to Take Action on Infected Files
Here are some basic examples of each action to get you started.
Copy Infected Files to Another Location
Here we will use the --copy=[/path/to/dir] option to copy infected files to another location. Since this is a copy operation, the infected file will now exist in two locations. Be careful!
[savona@putor ~]$ clamscan -r --copy=/home/savona/quarantine /home/savona/Desktop/TEMP/Example output:
[savona@putor ~]$ clamscan -r --copy=/home/savona/quarantine /home/savona/Desktop/TEMP/
/home/savona/Desktop/TEMP/PXL_20220306_153824232.jpg: OK
...OUTPUT TRUNCATED...
/home/savona/Desktop/TEMP/eicar_com.zip: copied to '/home/savona/quarantine/eicar_com.zip'

----------- SCAN SUMMARY -----------
Known viruses: 8611304
Engine version: 0.103.5
Scanned directories: 2
Scanned files: 20
Infected files: 1
Data scanned: 63.61 MB
Data read: 8861.18 MB (ratio 0.01:1)
Time: 20.945 sec (0 m 20 s)
Start Date: 2022:04:17 09:43:51
End Date:   2022:04:17 09:44:12
As you can see, the infected file was copied to the specified directory.
Move Infected Files to a Quarantine Directory
In this example we use the --move=[/path/to/dir] option to move infected files to another location. Preferably this would be a quarantine directory.
[savona@putor ~]$ clamscan -r --move=/home/savona/quarantine /home/savona/Desktop/TEMP/Example output:
[savona@putor ~]$ clamscan -r --move=/home/savona/quarantine /home/savona/Desktop/TEMP/
/home/savona/Desktop/TEMP/PXL_20220306_153824232.jpg: OK
...OUTPUT TRUNCATED...
/home/savona/Desktop/TEMP/eicar_com.zip: Win.Test.EICAR_HDB-1 FOUND
/home/savona/Desktop/TEMP/eicar_com.zip: moved to '/home/savona/quarantine/eicar_com.zip.001'

----------- SCAN SUMMARY -----------
Known viruses: 8611304
Engine version: 0.103.5
Scanned directories: 2
Scanned files: 20
Infected files: 1
Data scanned: 63.61 MB
Data read: 8861.18 MB (ratio 0.01:1)
Time: 20.393 sec (0 m 20 s)
Start Date: 2022:04:17 09:48:55
End Date:   2022:04:17 09:49:15
You can see clamscan moved one file into the specified quarantine directory. It also renamed the file with a .001 directory as a precaution.
Remove (Delete) Infected Files with clamscan
Here we use the --remove=[yes/no] option to delete any infected files. We are also using the -i option here to suppress output of non infected files.
[savona@putor ~]$ clamscan -i -r --remove=yes /home/savona/Typically removing files from your home directory is safe. I still recommend running a scan and then taking manual action against infected files for inexperienced users.
Example output:
[savona@putor ~]$ clamscan -i -r --remove=yes /home/savona/
/home/savona/Desktop/TEMP/eicar_com.zip: Win.Test.EICAR_HDB-1 FOUND
/home/savona/Desktop/TEMP/eicar_com.zip: Removed.
/home/savona/quarantine/eicar_com.zip: Win.Test.EICAR_HDB-1 FOUND
/home/savona/quarantine/eicar_com.zip: Removed.
/home/savona/quarantine/eicar_com.zip.001: Win.Test.EICAR_HDB-1 FOUND
/home/savona/quarantine/eicar_com.zip.001: Removed.

----------- SCAN SUMMARY -----------
Known viruses: 8611304
Engine version: 0.103.5
Scanned directories: 3158
Scanned files: 57213
Infected files: 3
Total errors: 2
Data scanned: 3022.12 MB
Data read: 20096.71 MB (ratio 0.15:1)
Time: 624.157 sec (10 m 24 s)
Start Date: 2022:04:17 09:54:00
End Date:   2022:04:17 10:04:24
Using the ClamTk GUI to Take Action on Infected Files
When a scan initiated with the ClamTk GUI completes you will be met with a summary screen. If no infected files were found, it will notify you and the only option presented is to close the summary screen. However, if it does find an infected file you will be presented with three options.
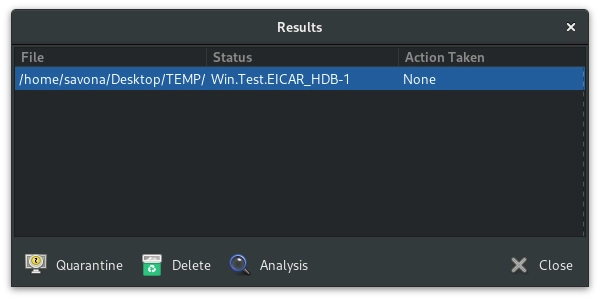
The quarantine option will move the file into the default ClamTk quarantine folder and rename it. On my system the default quarantine folder was /home/savona/.clamtk/viruses. The Delete option will simply delete the file.
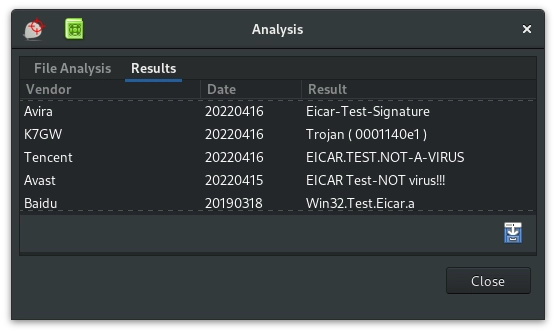
Clicking on the Analysis option will allow you to submit the file to Virustotal. If the file has been previously submitted you will be presented with information from other antivirus vendors. This will allow you to make a more informed decision on how to act on this file.
Advanced ClamAV Configurations
This article was not written to cover all options or configurations. It was written as a basic ClamAV primer to help the average Linux user get started. However, it is important to know that there are more advanced configurations. You can run ClamAV as a daemon, configure on-access scans, and use options and regular expressions to narrow down your scan.
Let us know in the comments if you liked this article and would like to see another tutorial on advanced ClamAV configurations.
Okay. How do I use ClamTK to scan my Windows partition? When I point it at where the partition is mounted in /mnt/ it goes for a second or two and says “nope! no threats found!” which makes me think it’s not recursing the directories, which is pretty retarded behavior for a virus scanner. I’m not going to have to scan each individual file of an entire Windows installation, am I?
Try using the recursive flag.
clamscan -r /mnt/Windows-Dir/