In this tutorial we will be discussing different ways to connect to a Microsoft share form Linux. Before we dive in I think it is important to understand the different terminology used when talking about Samba, SMB and CIFS shares.
Table of Contents
SMB vs CIFS vs SAMBA
SMB (Server Message Block) is a protocol used for network file sharing. It was originally designed at IBM in the 1980’s.
CIFS (Common Internet File System) is a implementation of SMB that was created by Microsoft.
SAMBA is an open source software suite and set of utilities used by UNIX/Linux to communicate with Microsoft Windows systems.
From the average user stand point SMB and CIFS can be used interchangeably. As you will see below, we will connect to the same share using both SMB and CIFS.
Mount a Windows Share Using GUI (Files / Nautilus)
You can easily connect to a Windows share using the Files application (formerly known as Nautilus) that ships with Gnome. For the sake of clarity, we will call it Nautilus.
Open the Nautilus application and select “Other Location” from the left places panel.
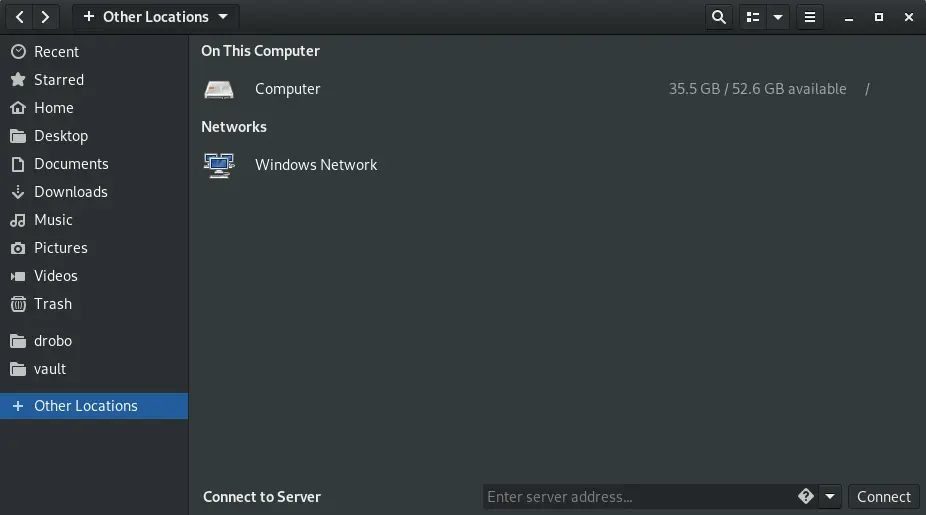
At the bottom of the screen you will see “Connect to Server” with a box asking for you to enter the server address. Inside that box is a diamond with a question mark in it that you can click for some help.
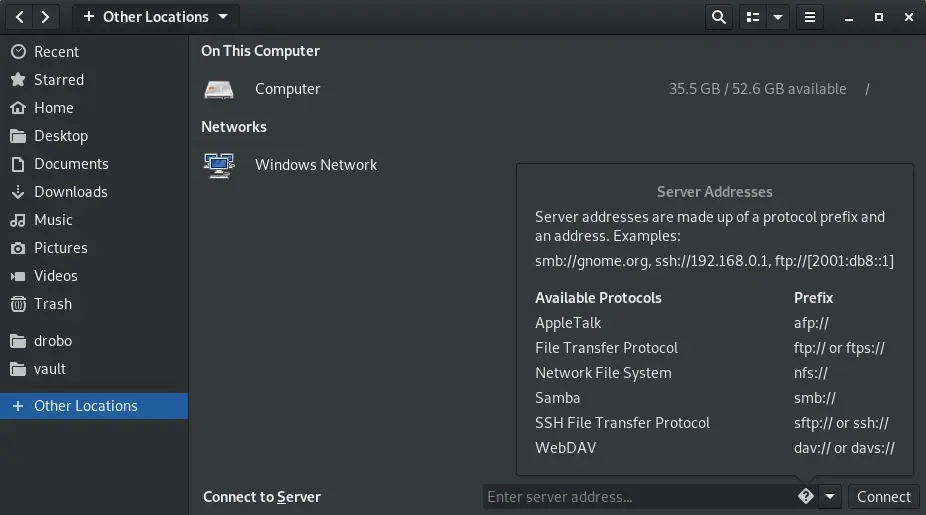
As you can see in the pop-up, server addresses are made up of a protocol prefix and an address. On my Windows machine named “MyMuse” I created a share called “SharedDocs”. So inside that entry box we will use:
smb://mymuse/shareddocs
We can also use the IP address:
smb://10.0.0.3/shareddocs
This will bring up a dialog box asking for authentication credentials.
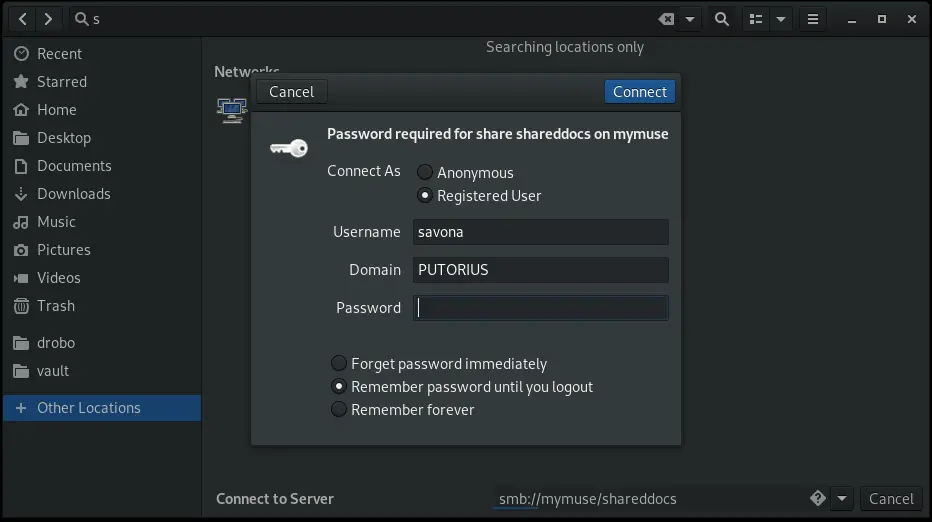
Select the “Registered User” radio button and enter your details. You have three options for storing your password.
- Forget password immediately – This will log you in and and soon as your session is over you will be required to provide your credentials again.
- Remember password until you logout – Remember your password until you explicitly logout.
- Remember forever – This option will store the credentials and allow you to easily return to the share.
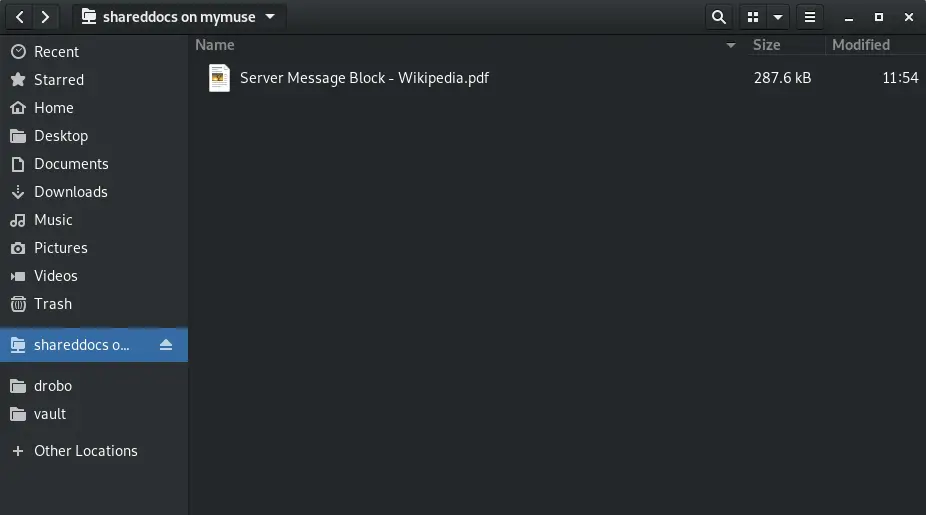
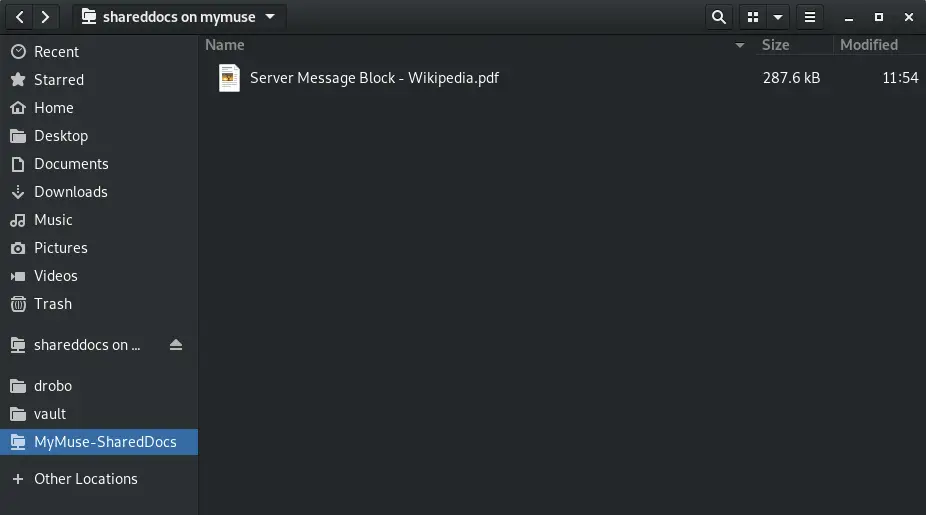
Once you are connected, Nautilus will show the location on the left panel allowing easy access to the share.
Be aware that once that connection is closed you will have to go back to “Other Locations” and use the drop down box to reconnect. If you want to make the share persistently accessible from the left menu you will need to add a bookmark.
NOTE: If you do not want to type your credentials every time ensure that you select “Remember Forever” when authenticating to the share.
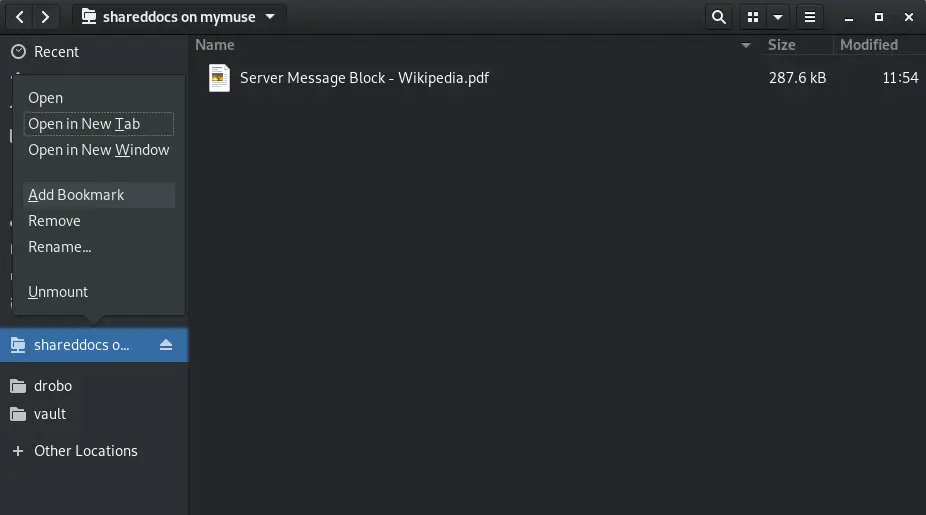
To add a bookmark, connect to the share then right click it in the left panel and select “Add Bookmark”.
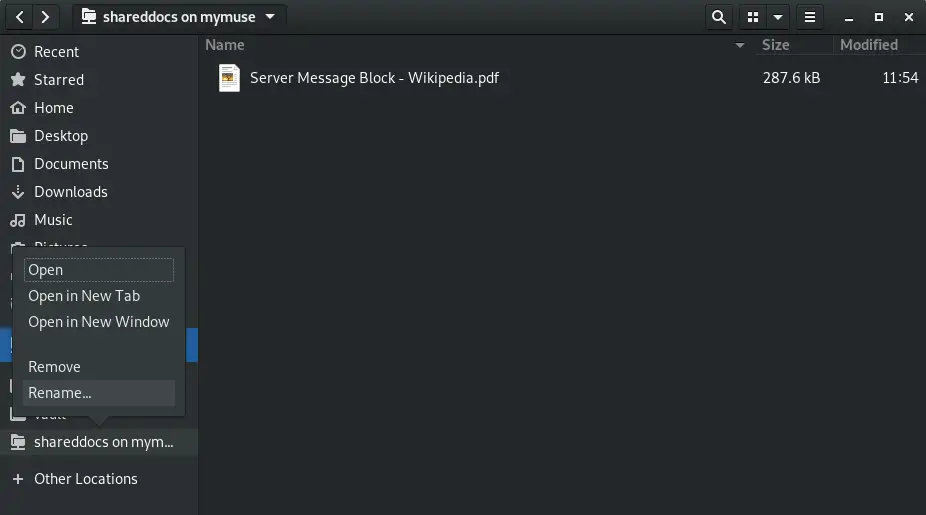
If you have a lot of shares, or multiple shares on the same device, it will be hard to differentiate them. You can rename them to something more user friendly by right clicking on the bookmark and selecting “Rename…”.
Now we can easily navigate to our share as the name is clearly visible and easy to identify.
Mount A Windows Share Using Command Line
Using the mount.cifs Command
You can easily mount a cifs share from the command line using the mount.cifs command. Using the mount command requires root privileges.
First, create a directory to mount the share:
mkdir /mnt/cifs
Use the mount.cifs command to mount the share at the created directory.
# mount.cifs //MyMuse/SharedDocs /mnt/cifs -o username=putorius,password=notarealpass,domain=PUTORIUS

# cd /mnt/cifs/
# ls -lrt
 total 284
 -rwxr-xr-x. 1 root root 287600 Mar  3 11:54 'Server Message Block - Wikipedia.pdf'
You can use the IP address as well.
# mount.cifs //10.0.0.3/SharedDocs /mnt/cifs -o username=putorius,password=notarealpass,domain=PUTORIUS
Alternatively, you can use mount -t cifs with the same syntax.
# mount -t cifs //10.0.0.3/SharedDocs /mnt/cifs -o username=putorius,password=notarealpass,domain=PUTORIUS

# ll /mnt/cifs/
 total 284
 -rwxr-xr-x. 1 root root 287600 Mar  3 11:54 'Server Message Block - Wikipedia.pdf'
Automatically Mount CIFS Share at Boot
Mount CIFS Share at Boot Using /etc/fstab
You can add your CIFS mount point in /etc/fstab and have the system mount it during boot. However, there are some considerations to make. If the share is not available at boot time the system will hang until the mount attempt times out, or worse, refuse to boot. This will cause a delay in accessing the system. To avoid this you can use autofs (next section). Also mounting it via fstab requires you to put your credentials somewhere in plain text. You have two options when using fstab to mount a CIFS share.
- Put the credentials in the fstab file itself – This is a huge security risk as fstab is readable by any user. Someone can simply cat the file and see your credentials. IT IS NOT RECOMMENDED!
- Use a credentials file – This entails saving your credentials in a separate file which can then be protected by permissions. Although your credentials will still be saved in plain text, someone would need root permissions to read them.
Because of the high risk of the first option, we will not even discuss how to do it. It is easy enough to use a credentials file.
First, create a hidden file in root’s home directory (/root/). You can call this file whatever you like. Most people call it .smbcreds or similar. In this file you need two lines, one containing “username=<your-username>” and one containing “password=<yourpassword>”.
Example:
# vi /root/.smbcreds
# cat /root/.smbcreds
 username=putorius
 password=notarealpass
Now set the permissions so it is only readable by root:
# chmod 400 /root/.smbcreds
Now edit the /etc/fstab file and add the following information:
- Remote server share address (//mymuse/shareddocs)
- Local mount point (/mnt/cifs)
- Filesystem type (cifs)
- options (credentials file=/root/.smbcreds)
- dump option (0)
- check option (0)
Example fstab, last line showing the CIFS mount point.
[root@putor ~]# cat /etc/fstab
 /dev/mapper/putor-root  /                       ext4    defaults        1 1
 UUID=c13ac7eb-9e4b-4ee9-b0d4-4302c4030323 /boot                   ext4    defaults        1 2
 /dev/mapper/putor-home  /home                   ext4    defaults        1 2
 /dev/mapper/putor-swap  swap                    swap    defaults        0 0
 //MyMuse/SharedDocs    /mnt/cifs       cifs    credentials=/root/.smbcreds 0 0
Mount CIFS Share using AutoFS
The most obvious benefit of using autofs is that the share is only mounted when being accessed. If it is unavailable it will not effect your system when it boots.
Using autofs has the same credentials issues described above with fstab. It is also necessary to store your password in plain text when using autofs for cifs shares.
Installing autofs Package
Install autofs in CentOS 7, or Red Hat 7:
# sudo yum install autofs cifs-utils -y
Install autofs in Ubuntu 18:
# sudo apt-get install autofs cifs-utils -y
Let’s configure autofs to mount our Windows share.
Create Credentials File
First, ensure you create the credentials file as described above:
# vi /root/.smbcreds
# cat /root/.smbcreds
 username=putorius
 password=notarealpass
DO NOT forget to set the permissions:
# chmod 400 /root/.smbcreds
Get UID for User
Now, let’s get our user accounts uid so we can tell autofs to mount the share as our user instead of root.
$ id -u <username>
Example:
$ id -u savona
 1000
Edit auto.master Map File
Edit the /etc/auto.master configuration file. In this file we will provide a map of directories to shares for autofs to use. Add the following line to the file:
/mnt /etc/auto.shareddocs
The first part of the above line is the directory we are using as a mount point (you can create a custom directory if you wish). The second is the file that autofs should look in for instructions on how to connect to the resource and mount it.
Create the Shares File
Next edit or create the /etc/auto.shareddocs file and add the following:
shareddocs -fstype=cifs,rw,credentials=/root/.smbcreds,uid=1000 ://10.0.0.3/shareddocs
Restart the Service
Now we must restart the autofs service so it reads the new configuration.
systemctl restart autofs
Test and Verify
Now, let’s look in the /mnt directory.
ll /mnt
 total 0
The shareddocs directory doesn’t exist until you try to access it (auto fs). If everything above was followed, we should be to cd into that directory even though we do not see it. The directory will be dynamically created as it is accessed.
# cd /mnt/shareddocs
# ll
 total 284
 -rwxr-xr-x. 1 savona root      0 Mar  3 14:20 ok
 -rwxr-xr-x. 1 savona root 287600 Mar  3 11:54 Server Message Block - Wikipedia.pdf
Bob’s your uncle.
Conclusion
In this article we covered 3 different ways to mount your Windows shares in Linux. You should now be able to mount an SMB share via the GUI, manually on the command line, automatically on boot and with autofs.
An important point I would like to stress is make sure you protect your credentials. I hope you enjoyed this tutorial, please leave feedback or questions in the comments below.
I think you might need to edit this line…
“# chmod 400 /rot/.smbcreds”
Good catch, thanks!
Thanks good information here!
great article thank
this is what i needed thanks!
Very good article for the beginners. Easily understandable with the help of screenshots. Each and every step is very well defined.
Thanks for the article. But I am going to pass 🙁
Doing such simple thing as mounting a network share takes so much time, so much console voodoo. I is a mess, a nonsense.
I wasted 4 hours trying various methods to mount samba share, all methods has some disadvantages, some nonsense limitations, permission problems, all kinds of artificial obstacles. Looks like authors do not want people to use their software, it is a serious mess.
Mounting samba on linux feels like walking on mine field, and a long one.
On windows exactly same thing took less than a minute and was succesfull. ( yes, i know windows has some serious problems too )
It is no surprise pople complain about Linux. A simple thing took half a day, complete nonsens.
Yes, kernel itself is great, but the rest, i mean gui and all is a serious mess. Sorry, but that is true.
You are doing something wrong. Of all the Linux projects SAMBA is one of the most solid and stable. I use it daily with no issue.
Well, indeed i miss some detail. But the problem is more general. All those details are the problem itself.
On windows I do few clicks and it just works Even newbie is able to do it.
On linux I have to do lots of console voodoo with lots of details and tricky traps to make it work, and even if it works there are still some little issues.
So to make it short:
Windows – 60 sec and works
Linux – 4 hours and still problems
Do you see my point now?
I think devs ignore a lot usability part of system. No one who rate highly own time is going to use it that way.
ps. It works for me, but the process to make it work is a mess.
no I dont see your point. if someone gives me a samba share I can cannot to it in 30 seconds from the GUI. mounting a samba share from the gui in most linux distributions is trivial.
ok,
So ,try in xubuntu mount a share in /media/user/my_share
in a way that:
– it is persistent over reboot, and wifi reconnection
– it does not hung your pc when booting in case your share is not accesible
– it is really in /media/my_share and not in some random folder in /run/user/1000/gvfs
– GUI only, so do it without any console voodoo, package instalation , configuration in text files, no manual uid/gid settings, nothing like that, gui only
– your share is in read-write mode
– try to do it in less than, lets say 5 min 😛
good luck 😀
I know people did a lot of effort to make it work, yes, no doubt. Great respect for that.
But still it could be done better and more user friendly, especially the GUI part but not just that.
I dont use xubuntu and I am not going to spin a machine up just to test it. It seems you have made your mind up. Good luck.
how do you mount the \\servername root to a folder so it shows you all available shares? I have certain shares auto mounting through FSTAB but I want to see all shares as if I typed \\servername in windows