Google Drive is a cloud storage service that allows us to backup the files and access them securely from any device. In Linux, you can easily mount the Google drive using the Gnome online accounts utility. After mounting the Google drive, you can upload any data you want to backup to your Google Drive storage. But what if you want to automatically backup certain data to online cloud storage service at regular intervals so that you have an up to date backup at all times? With Gnome online accounts and Deja-dup, you can easily schedule file backups to Google Drive in just 6 steps.
Prerequisite – Mount Google Drive
First, follow our simple tutorial for mounting Google Drive in Linux. Once you have it mounted, complete the following steps to schedule your backups to Google Drive.
Schedule File Backups to Google Drive in Linux
Step 1: Install Deja-dup Backup Utility
Some Linux distributions like Debian come with Deja-dup backup utility preinstalled. However, it is readily available on almost all modern distros from their package manager. Below are examples on how to install it on different systems.
# Fedora
sudo dnf install deja-dup

# Ubuntu / Debian
sudo apt install deja-dup

# CentOS / Red Hat
sudo yum install deja-dup
NOTE: For Red Hat / CentOS you will need to enable the EPEL Repository.
Alternatively, you can install it as a snap from the Snap Store, which is available to almost all distributions.
Step 2: Launch Deja-dup
To launch Deja-dup backup utility, hit the super key and then type deja-dup in the search bar. When the search results appear, click on the Backups icon.
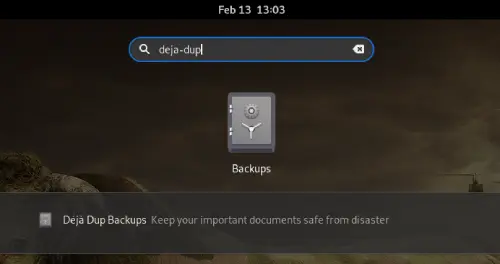
You can also launch deja-dup from the command line by simpy calling the program by name.
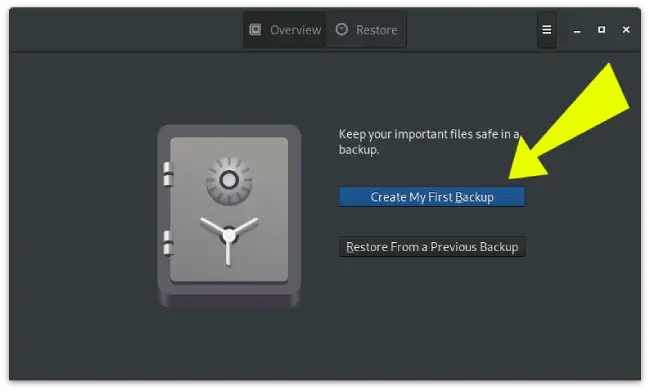
[savona@putor ~]$ deja-dupOnce the application is open you will be presented with the initial setup screen. Here you will select “Create My First Backup” to get started.
Step 3: Select Folders for You Want to Backup
On the next screen you will see two options. The top section is where you set the folders you want to be backed up. The bottom section is folders you want to ignore, or NOT back up. By default your home directory is selected to be backed up. Your Trash and Downloads directories are set to be ignored. You can remove folders with the minus buttons to the right, or add a folder using the plus sign.
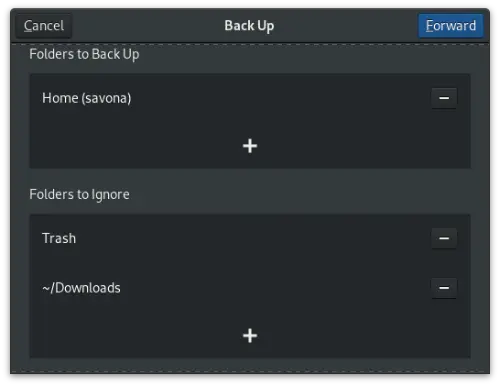
When you are done making your selections, hit the forward button to continue.
Step 4: Choose Google Drive as Backup Storage Location
Now you have decided what to include and exclude from your backup. Next, you need to select where you want to store the backup. On this next screen you can select the backup location (Google Drive) and the folder you want it to create your backup in. By default deja-dup uses your systems hostname as the backup folder.
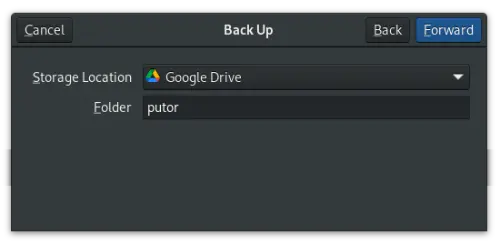
When you are happy with the settings, click the forward button to continue.
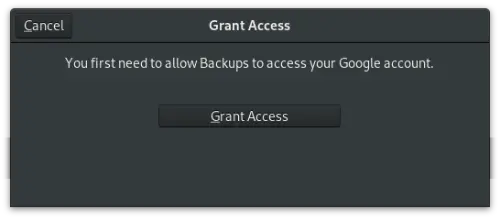
On the next screen you will be asked to grant access to your Google account. Clicking the button will open a browser window where Google will ask you to sign in and acknowledge the permissions you are granting the Deja-Dup Backups application.
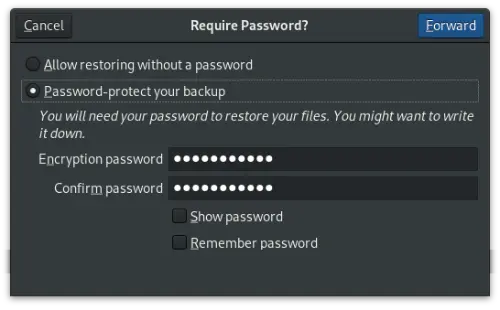
Step 5: Set Encryption Password for Backup Restores
On this screen you have the option to password protect (encrypt) your backup. I always recommend using encryption, especially when storing data in the cloud. However, this is optional. If you prefer to encrypt the backup, set a password and click forward to continue.
NOTE: Be sure to remember or write down your password. YOU WILL NOT BE ABLE TO RESTORE WITHOUT THIS PASSWORD.
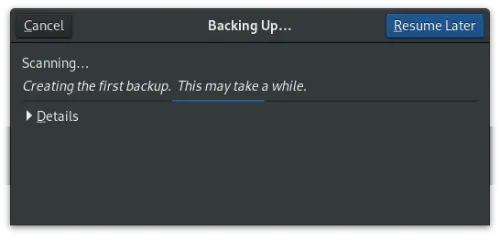
Your initial backup will start as soon as you hit forward. Click the “Resume Later” and continue to the next step to set the schedule for automatic backups.
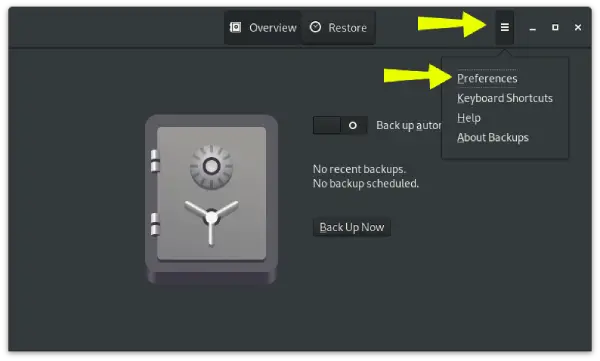
Step 6: Set Schedule for Automatic Backups to Google Drive
In the final step we will configure automatic backups. Open the Deja-Dup application, select the hamburger menu, and click preferences.
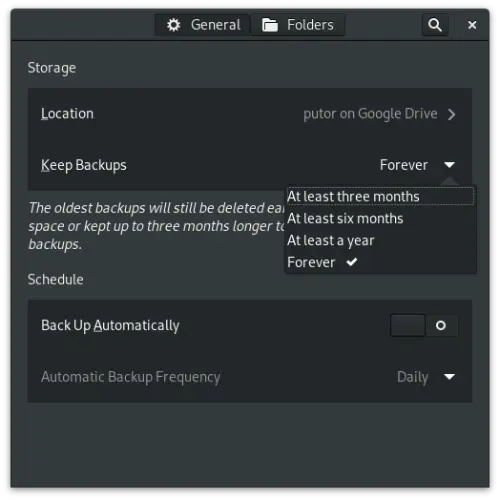
On the preferences screen select how long you would like to keep backups. I am selecting forever, but keep in mind that this will use a lot of space. You can select a shorter time period to save space.
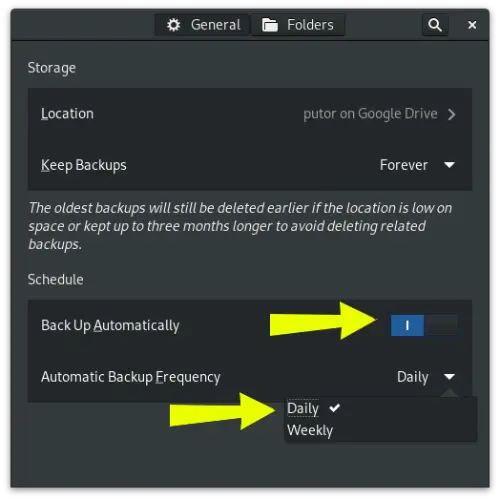
Under Schedule turn on Back Up Automatically and then click the drop down to select your backup frequency. Here I am selecting daily. Keep in mind that my settings will use the most amount of disk space. Use whatever fits your needs.
That’s it! In just six simple steps you can schedule automatic backups to Google Drive using Deja-Dup.
Resources and Further Reading
- DejaDup – Gnome Applications